How to Complete Identity Verification (KYC) for a Personal Binance Account
To unlock all features on Binance, you’ll need to complete the identity verification process. Below is a clear, step-by-step guide that walks you through everything you’ll see on the Binance website.
1. Access the Identification Section
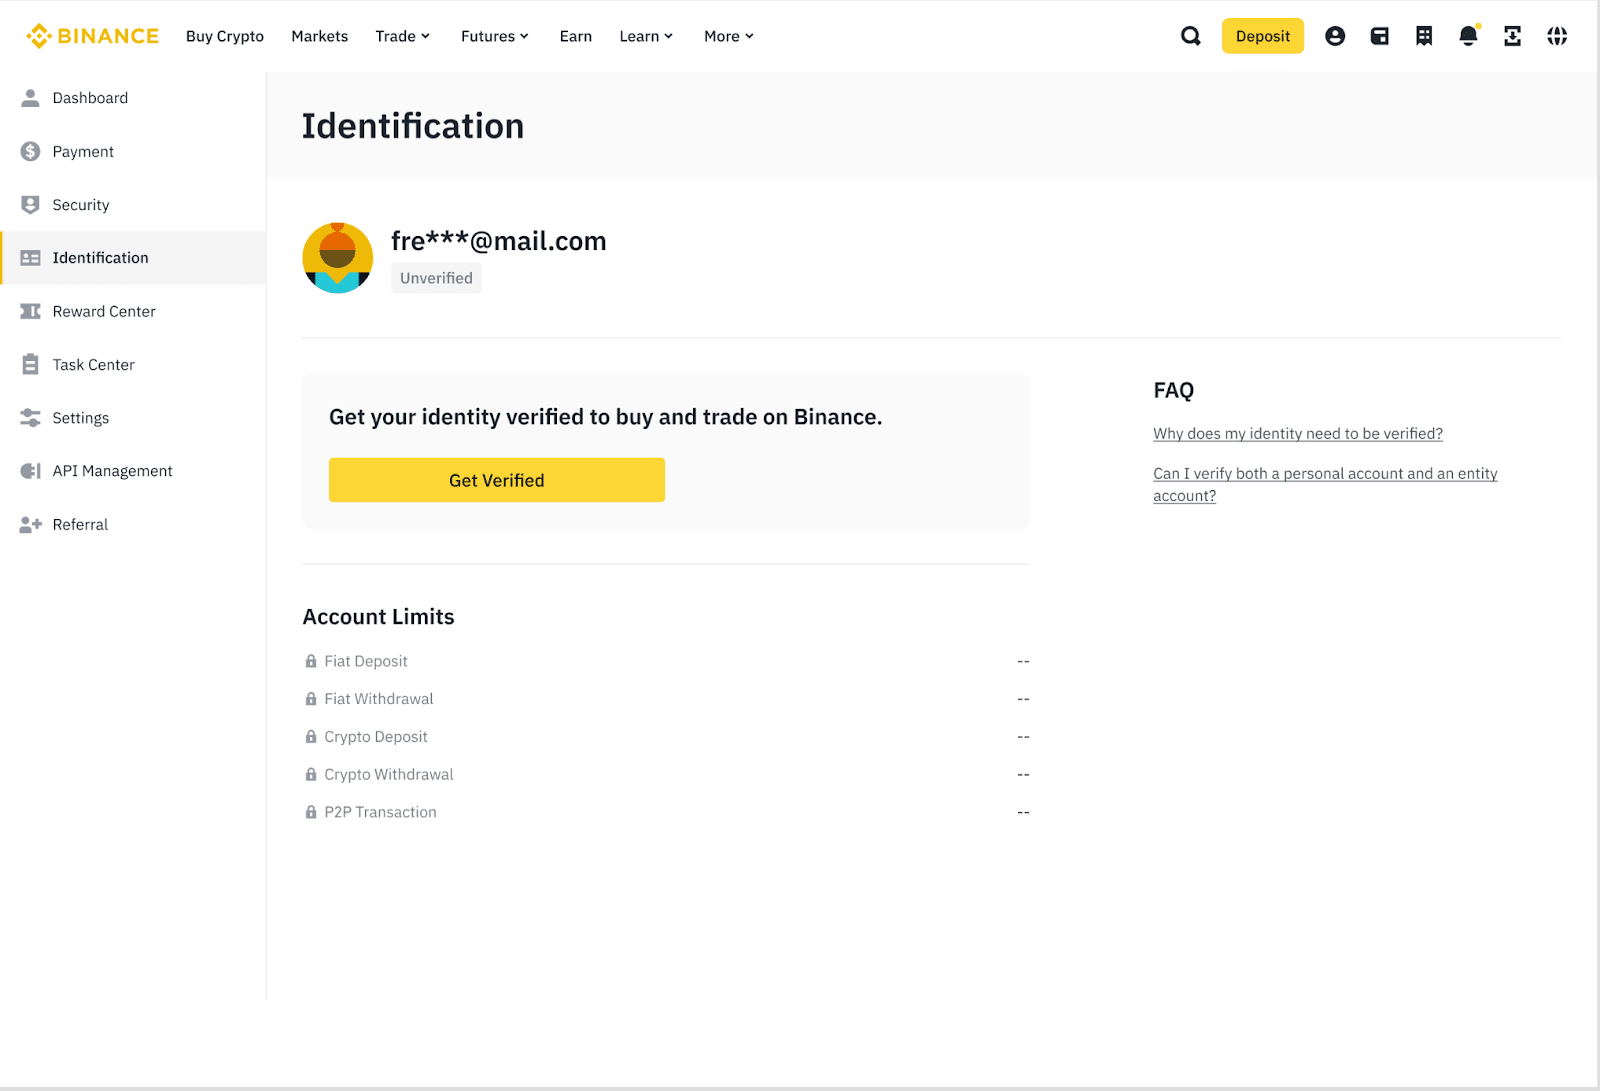
After logging in, hover your mouse over your profile icon in the upper-right corner.
Click “Account”, then navigate to the “Identification” page where verification begins.
2. Start the Verification Process
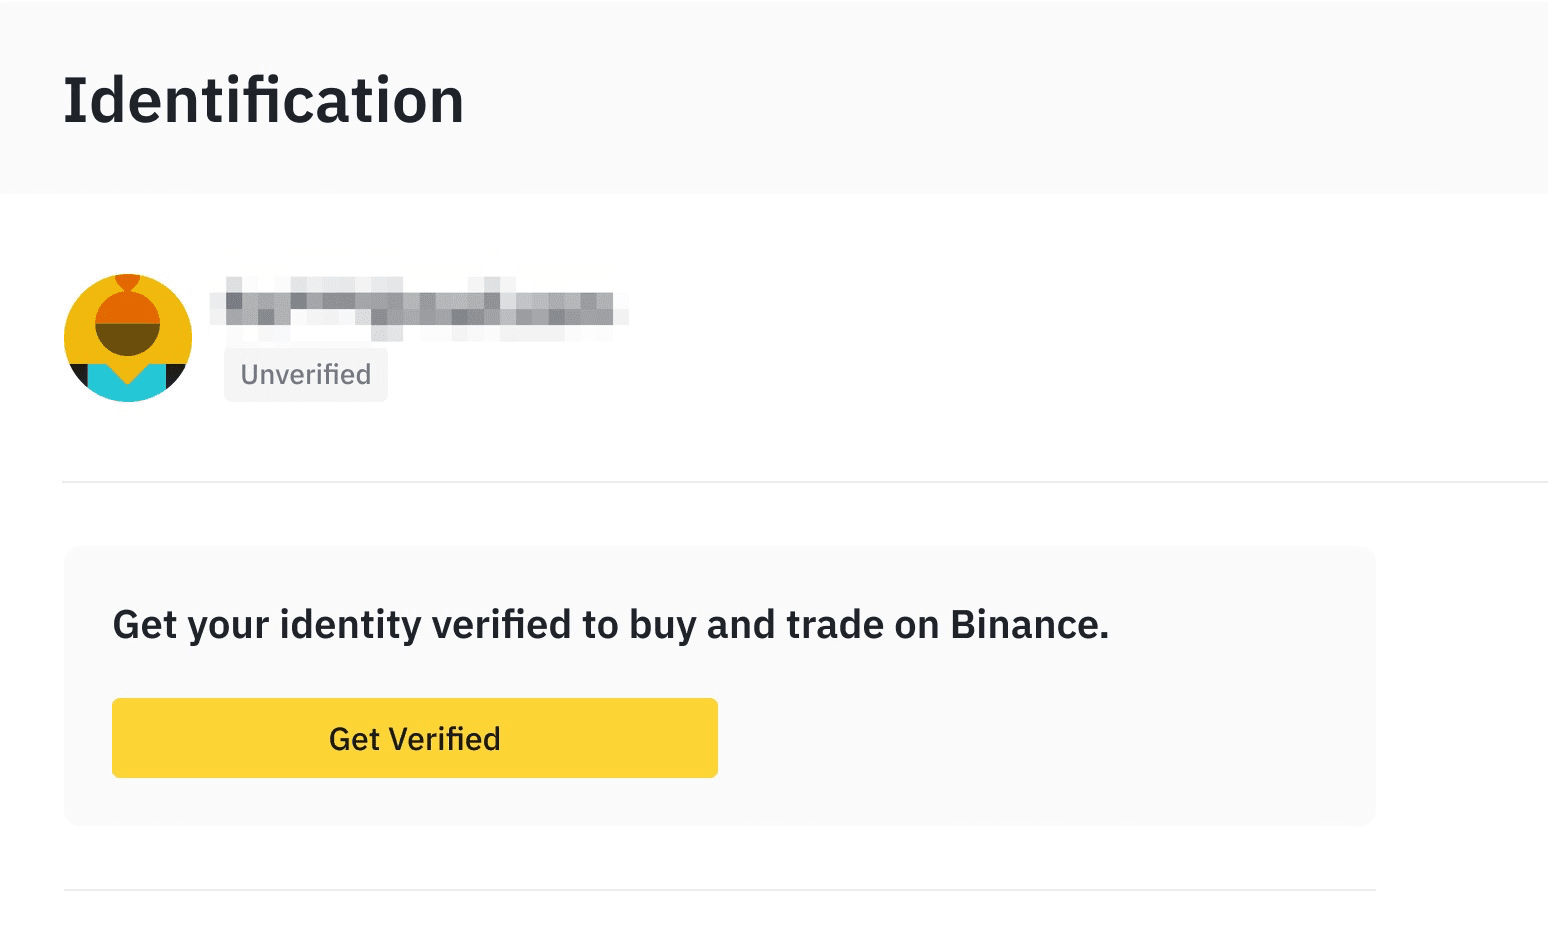
On the Identification page, you’ll see a button labeled “Get Verified.”
Click it to move on to the next stage and begin your KYC submission.
3. Select Your Country of Residence
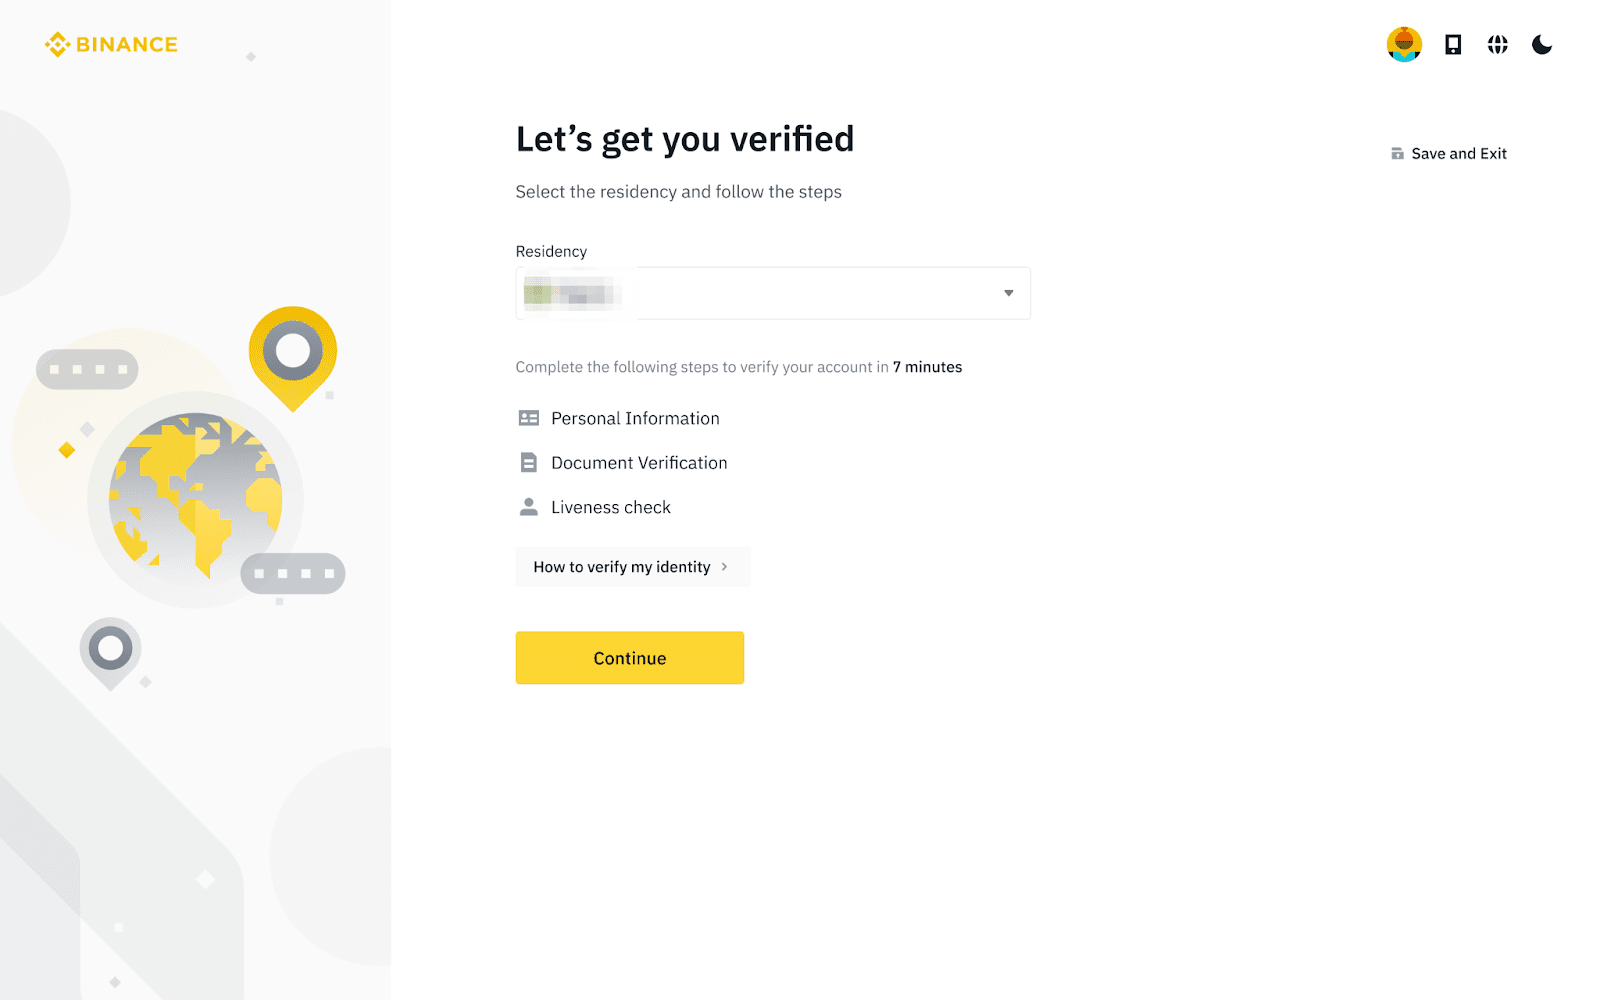
Choose the country where you currently live.
This step is important because the required documents and verification settings vary based on your region.
4. Enter Your Personal Information
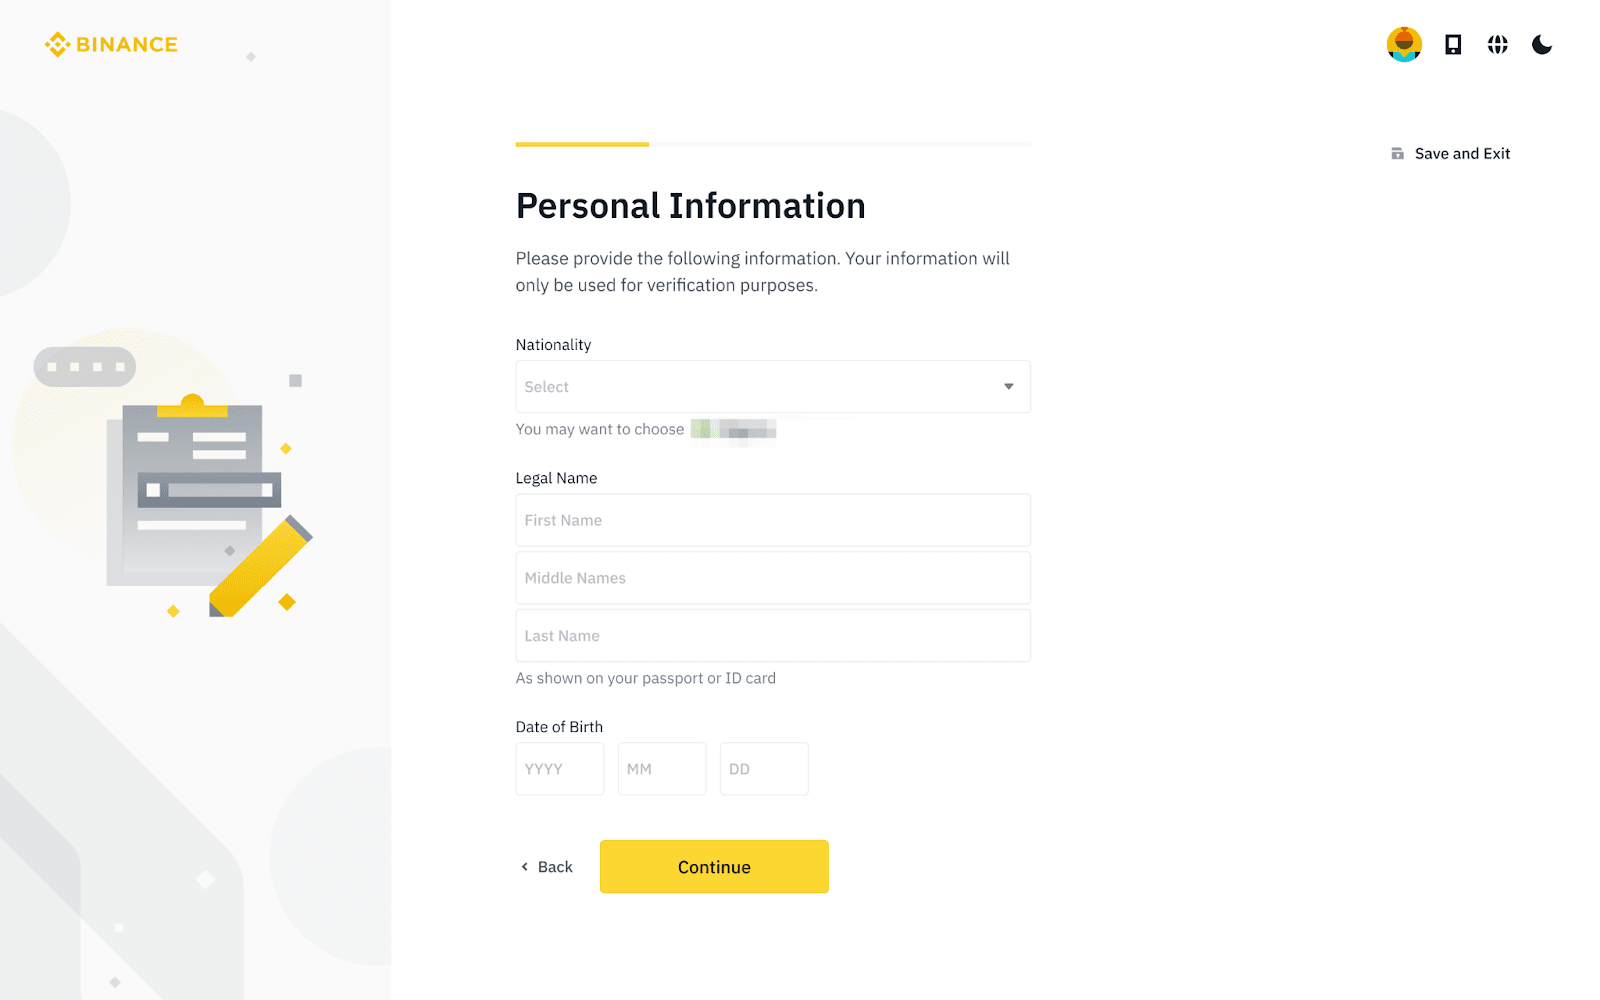
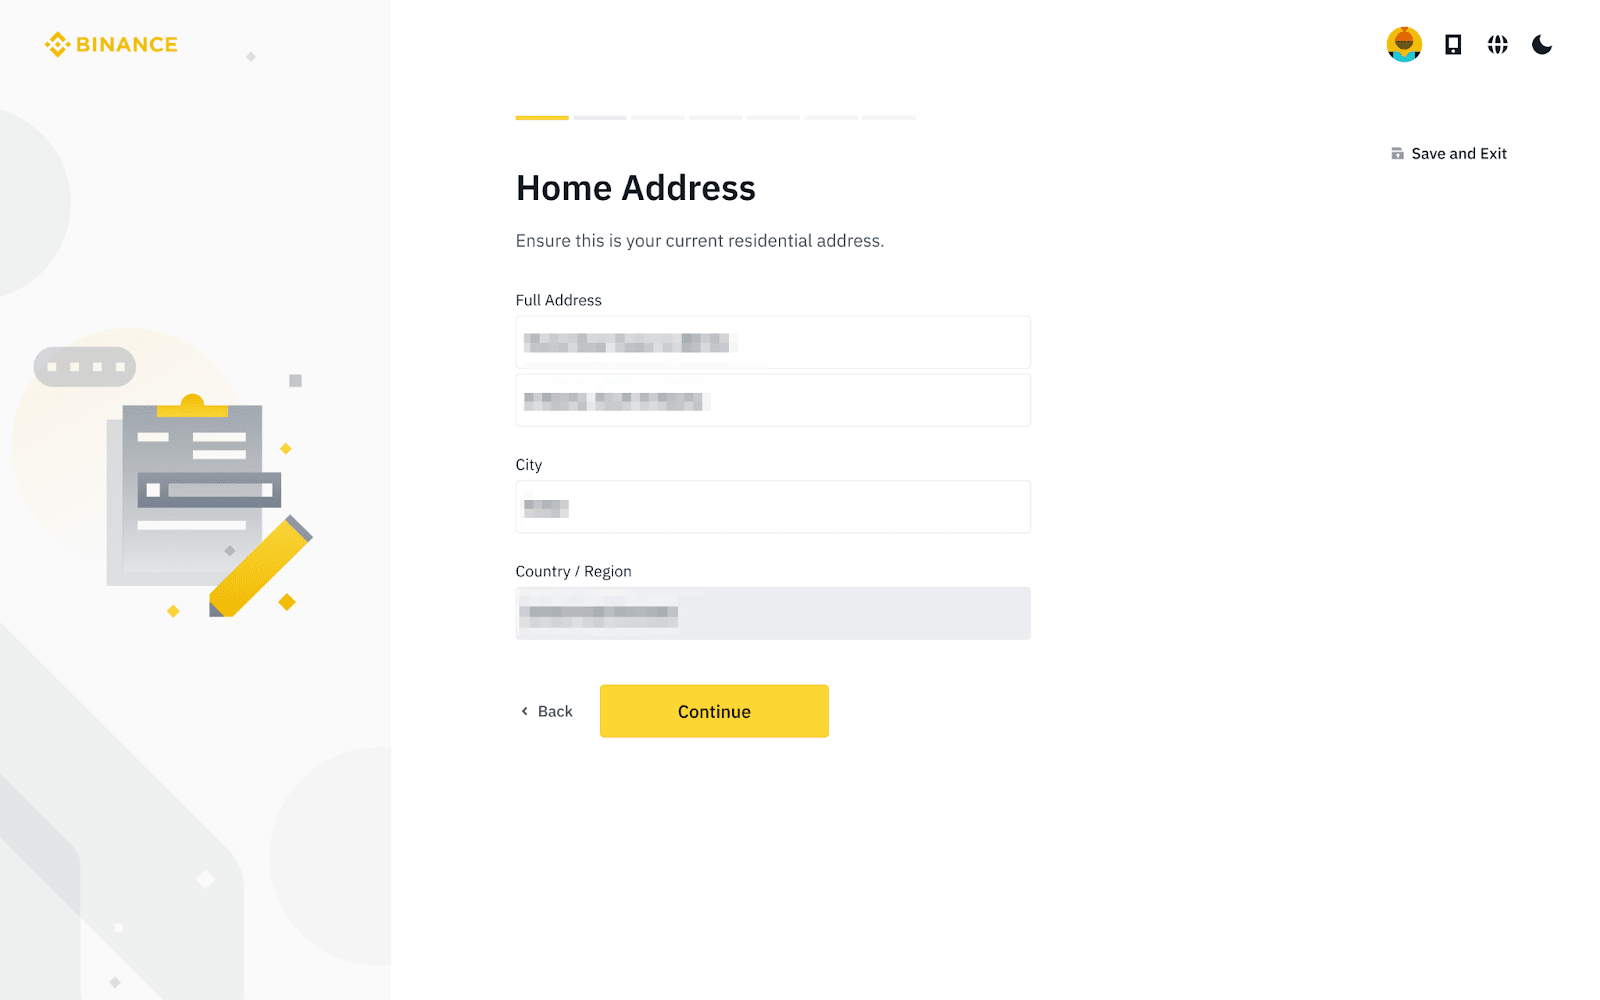
Fill in your details exactly as they appear on your official ID documents, then click “Continue.”
Make sure every field matches your ID — once confirmed, you won’t be able to modify these details.
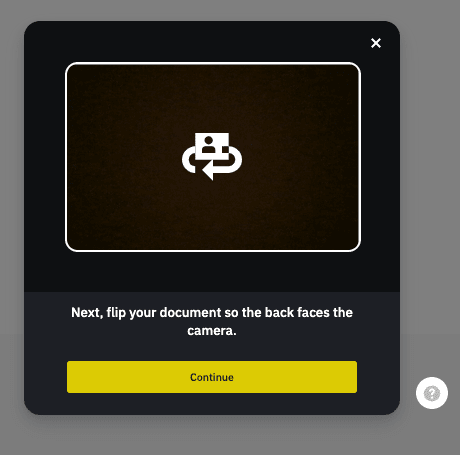
5. Upload Your Identity Documents
Next, Binance will ask you to verify your identity with official documents such as a passport, national ID, or driver’s license.
You can choose one of two options:
Take photos directly using your device’s camera
Upload existing photos of your documents
Select the method you prefer and continue.
6. Complete the Liveness Check
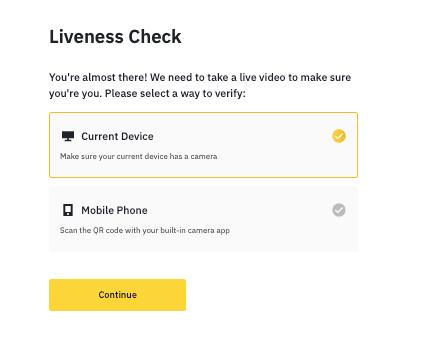
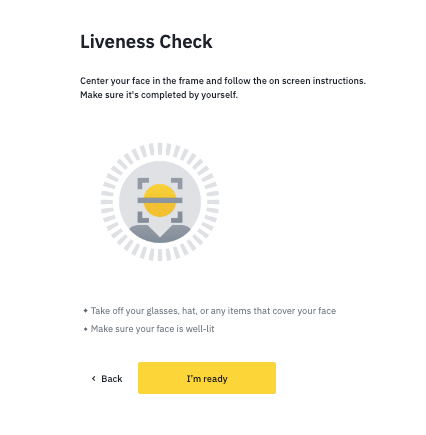
To ensure the authenticity of your submission, Binance will guide you through a quick liveness (face) verification.
Follow the on-screen instructions and keep these tips in mind:
Make sure camera permissions are enabled
Avoid hats, glasses, masks, or filters
Ensure you’re in a well-lit environment
This step only takes a few seconds.
7. Wait for Verification Results
After submitting everything, Binance will review your information.
You’ll receive a notification once your verification is approved.
Important:
Do not refresh the page or close your browser while your submission is being processed.